Using Epson Expression 10000/11000 XL or V750 Scanners
- Clean platen (Instructions from Epson manual)
- Press the power to turn the scanner off, and unplug the power cord.
- Caution: Always unplug the scanner before cleaning.
- Use a soft, damp cloth and mild detergent to clean the outer case.
- Caution: Be careful not to spill liquid or let water get into the scanner mechanism
or electronic components. This could permanently damage them. - Never use alcohol, thinner, or corrosive solvent to clean the scanner. These
chemicals can damage the scanner components as well as the case.
- Caution: Be careful not to spill liquid or let water get into the scanner mechanism
- Clean dust and smudges from the document cable glass with a soft, dry d oth (a
microfiber glass cleaning cloth is recommended). You can also use compressed air
spray cleaner.- To remove grease, use pretreated lens or scanner wipes, or a small amount of glass
cleaner on a soft cloth. Dry the document table glass afterwards. - Caution: Never spray glass cleaner directly on the document table. Always spray
it on a cloth first and then wipe the glass . - Never use a harsh or abrasive brush or cleaning product to clean the document
table. A damaged glass surface can decrease the scanning quality. - Avoid leaving photos on the scanner glass for extended periods of time, or
residue from the photos may adhere to the glass.
- To remove grease, use pretreated lens or scanner wipes, or a small amount of glass
- Press the power to turn the scanner off, and unplug the power cord.
- Turn on scanner and make sure it is plugged into the computer with a USB cord.
- Open the program “EPSON Scan.”
- Open the lid of the scanner and place the corner of the material to be scanned on the glass face down in the upper left hand corner, or the one with a white triangle. Close the lid.
- The “Epson Scan” window should be visible with different options. Make sure it is in Professional Mode at the top of the window. To change a preference:
- Document Type
- Reflective- any material that is not transparent
- Film- any transparent document (must use proper equipment if needed)
- Document Table
- Auto Exposure Type
- Photo- Use for most everything
- Document Type
- Determine the resolution and quality of the scan to be made.
- CHECK your materials and adjust the scan quality accordingly. Do not assume that presets are correct.
- If any alterations on the document need to be made, the buttons under “Adjustments” can be used to alter the colors of the document, tone, or histogram.
- Yearbooks– when working with yearbooks check the Descreening selection.
- Go to “Configuration” at the bottom of the Epson Scan program and click the “Color” tab. Make sure “No Color Correction” is selected to keep Epson software from inserting it’s own color profile into the digital image.
- To preview the scan first, which is helpful when scanning multiple items at once, click “Preview.”
- After the “Preview” window pops up, you can select individual items by simply clicking-and-dragging across the opposite corners of that item. Repeat over each item to select all.
- To delete each selection, or marquee, simply select the section to be deleted and click the “Delete Selected Marquee” button. Always delete your previous marquee selections when scanning the next item.
- To create a marquee of the same size, select the marquee you wish to be copied and click the “Copy Selected Marquee” button.
- To further bring in the selected area around an item, select an area around the item. Then, click the “Automatic Image Locator” button. This should reduce the amount of extra space around the edges of the document.
- To select all marquees in a scan, simply click the “All” button.
- Once you are ready to scan and save the document, click the “Folder” button to the right of “Scan.” Choose the destination folder, the name of the document, and the format to be saved in TIFF.
- Last, press the “Scan” button to scan to item. After the scanning is complete, press the “Add Page” to scan another document, the “Edit Page” to do post-scan editing, or “Save File” to exit the program and save the file.
If you click “All” in the preview window and then press “Scan,” you will scan each item individually, BUT it will appear to save one piece of the document. All the individual pieces are inside the document; it is just saved as one large file.
Epson Troubleshooting
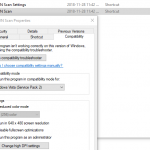 Epson scan freezes when using different applications on Windows 10. Running the Windows troubleshooter will help resolve the issue and it will force the application to run in compatibility mode with Windows Vista (Service Pack 2). Some users have reported also enabling “Run this program as an administrator” helps.
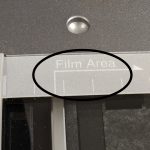
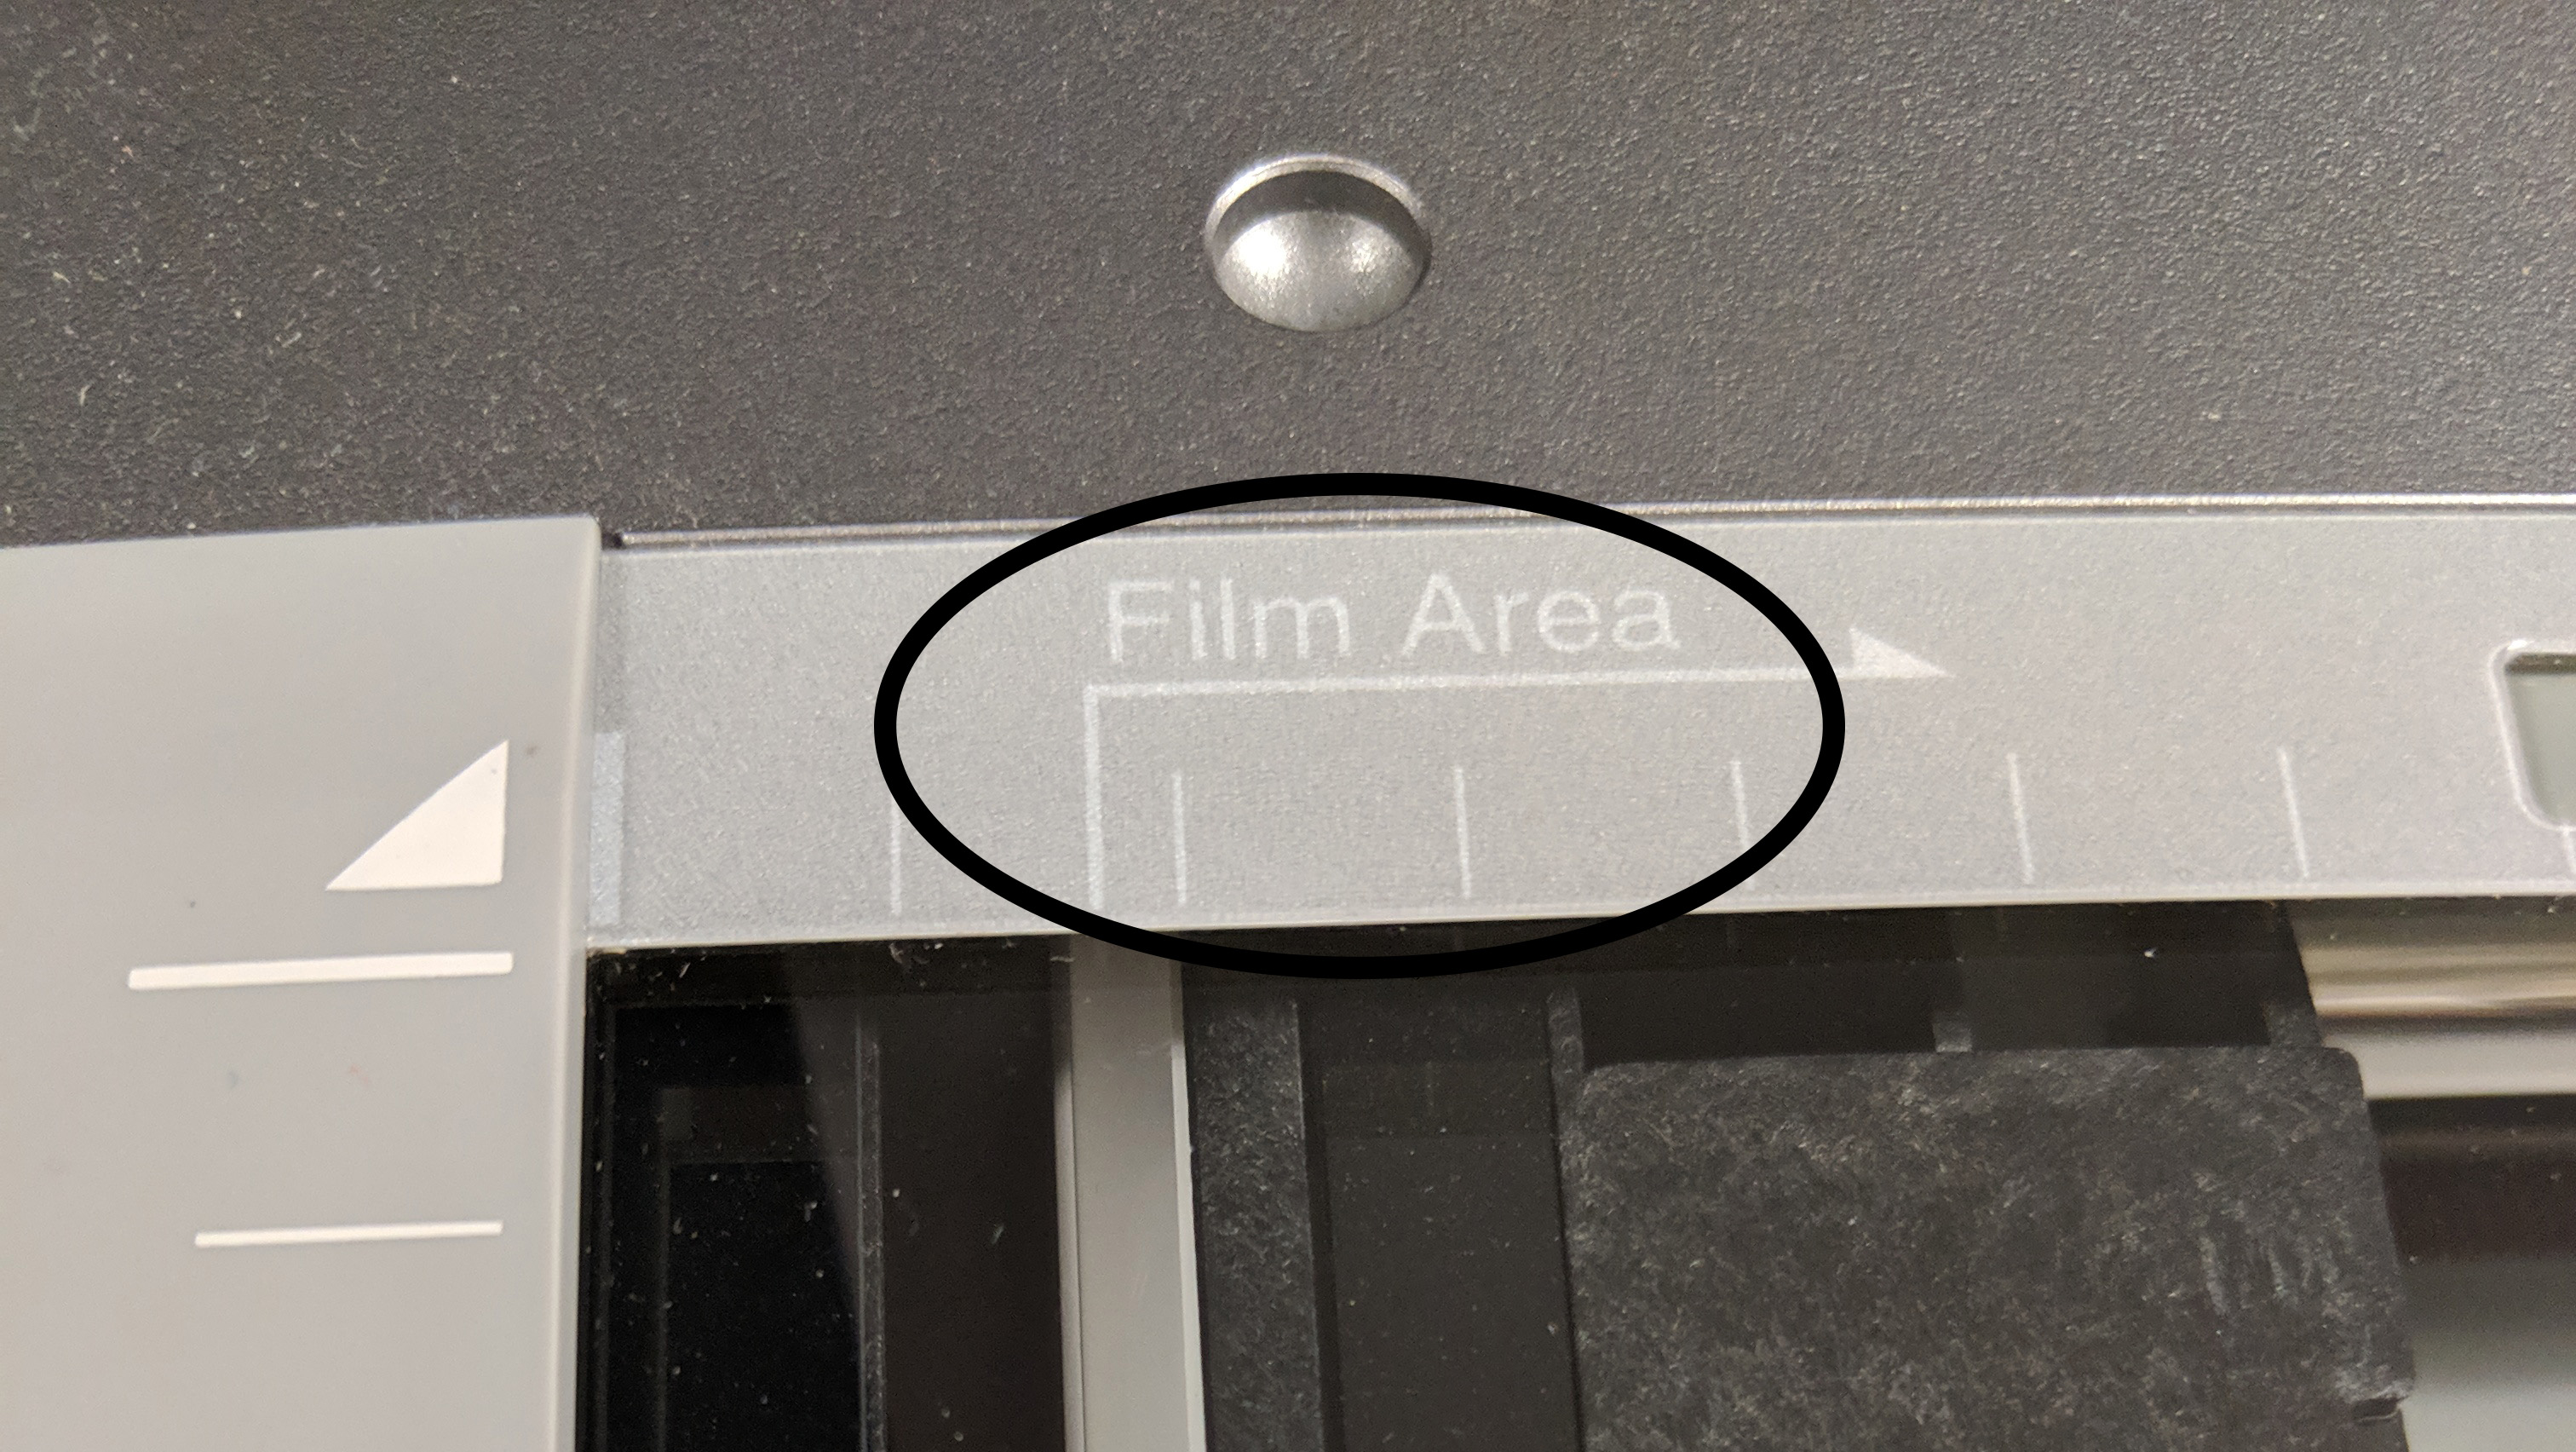
- Scanning film (negative or transparency) the preview image returns static. Make sure film is placed beyond the film guide labeled on the scanner in the top left corner.